
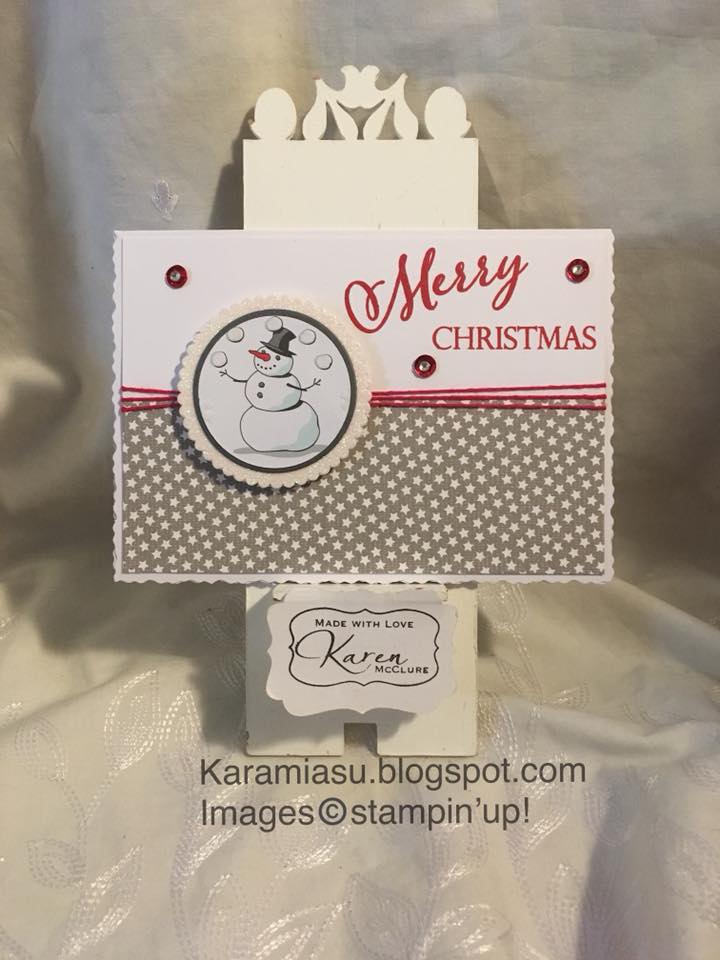
This card started off with my topper literally the snowman and I created the card around him.
I tried (as you will see in the video) the real red behind him but didnt really like it, I much prefer the basic gray it just looks more fitting.
Then added the sparkle glimmer paper.
I then chose the DSP I opted for the Gray Granite with white stars from the Festive Farmhouse DSP,
It fitted well with what I had so far but needed something to bridge that and the whisper white top half so I used the real red bakers twine and I liked that.
Next was the sentiment and I knew the merry christmas to all Photopolymer stamp set was going to be perfect so I chose Script version of Merry and the straight font of Christmas and positioned them on my block to how I wanted them to be.
I practice stamped with the real red and it was perfect.
Stamped on the space I had but it was too high for my liking but nothing I could do it was stamped so I finished it off with some red sequins from my stash.
Now to recreate it better than before

Im sure you will agree it is much better.
so heres how what we need to recreate it
Supplies
a6 Card base
Stamping layer (14.3cm x 10cm)
Festive Farmhouse DSP 5cm x 14.3cm
Cherry Cobbler Double stitched Ribbon or Real Red Bakers Twine
Sparkle Glimmer Paper (check your scraps)
Basic Gray (check your scraps)
Snowman cut from Santa's workshop DSP
Merry Christmas to All Photopolymer Stamp Set
Layering Circles Framelits
Real Red Ink Pad
Sequins and rhinestones to decorate
Method
- Layer your festive Farmhouse DSP on to the bottom section of your whisper white stamping layer.
- Cut your circles I used 4th smallest straight circle for the Basic Gray and the 5th Smallest for the sparkle glimmer paper.
- I then mounted them (topper on to the basic gray, then both of them on to the glimmer paper)
- Position your stamps on your card where you feel they will work best then pick them up with your acrylic block once you are happy, ink up the stamps with Real Red and stamp on to your stamping layer.
- Add your ribbon or twine to bridge the DSP and the stamping Layer.
- Then add dimensionals to your snowman so he will be popped up. and position him where you wish.
- Lastly I used 3 red sequins from my own stash and 3 rhinestones in the centre of them to complete my card
I hope you enjoyed this tutorial please have a go at recreating this card, its so simple and really cute.

No comments:
Post a Comment